Monday, 18 August 2014
Wednesday, 13 August 2014
Keyboard ShortCut to Hide/Unhide Rows & Columns in Excel
Excel: Keyboard shortcut to hide rows or columns
Ctrl + 9 : Hide the selected rowsCtrl + 0 : Hide the selected columns
Excel: Keyboard shortcut to Unhide hidden rows or columns
Ctrl + Shift + 9 : Unhide any hidden rows within the selectionCtrl + Shift + 0 : Unhide any hidden columns within the selection
Saturday, 24 May 2014
Google Panda 4.0 is Officially Released
Panda 4.0 has been officially released and is rolling over as Matt Cutts confirmed it with his tweet.
They have released a new algorithm update also to their Payday Loan Algorithm update. This algorithm specifically targets “very spammy queries” and is unrelated to the Panda or Penguin algorithms.
They have released a new algorithm update also to their Payday Loan Algorithm update. This algorithm specifically targets “very spammy queries” and is unrelated to the Panda or Penguin algorithms.
Google is rolling out our Panda 4.0 update starting today.
— Matt Cutts (@mattcutts) May 20, 2014
This past weekend we started rolling out a ranking update for very spammy queries: http://t.co/NpUZRqpnBI
— Matt Cutts (@mattcutts) May 21, 2014
Sunday, 18 May 2014
How to Protect All Of Your Business Google Apps Data Through Backup

Google that is serving different needs of internet users for a long time with emailing facility via Gmail
also introduced some Apps to offer
more ease so one can easily perform different tasks over Google. With such apps
users can manage quick sharing and usability of emails, calendars, docs, groups,
sites and other important things. With ease of quick connectivity from anywhere
a team working on Google Apps can flawlessly work towards completion of their
tasks. Email accounts created with Google Apps consume lot of memory space for
which users need to pay and if in any case the Google account is in unused mode
then, better to remove that account. Such conditions come to companies and organizations.
The other concern that lets the users delete or backup data from
Google account is protection of data from unauthenticated users. At times,
query like how to protect all of your business Google Apps data roams around.
In such scenes, users can take back-up of their Google Apps account data into a
very common file format that will be accessible into distinct editions of
highly used email client for desktop users. And deletion of data from Google
account after backing up the data will be a good idea if you want to follow the
way with which you can save the storage area also when desired information is
backed up.
Protection Of Google Apps Data Through Backup Into PST
MS Outlook, that is playing role of email client for thousands
of peoples access the emails, tasks, calendars, contacts etc into PST file
format and this information will be accessible when user is not connected to
internet . E-mail data of Gmail, Yahoo, and Hotmail emailing applications can
easily synced into MS Outlook. And once the Gmail data gets downloaded into
Outlook and stored into PST, it will become accessible over all the editions of
MS Outlook running on Windows.
The same concept when followed for backing up Google Apps
details into PST file format then, protection as well as local access of emails
along other details will be increased. And when it is all about to keep emails
without altering basic properties including data shift for documents in same
file format then, this practice will be beneficiary for all.
Shift Google Backup Data For
Your Ease
Google
Apps data when can easily performed into latest file formats like PST, MSG,
EML, and MBOX. Once the backup is taken, details and data can easily eliminate
from existing Google Apps account without altering and damaging other
information. All such facilities are available with Google Backup tool that
also assists to backup documents of Google account into distinct file format.
Monday, 5 May 2014
How to Import CSV/VCF Contacts to iPhone 3GS/4/4S/5 for Free
There can be several ways to import contacts from CSV/VCF files to iPhone. First, while searching on internet you can find different third-party software which allows to import contacts in iPhone but they may charge you more then the expectation; hence I would like to provide you free manual process to import CSV/vCard contacts to iPhone 3GS/4/4S/5.

I am providing you 5 methods to import contacts in iPhone from CSV/VCF.
1. Mail your contacts i.e. CSV/VCF file to your iPhone
This method can be implemented in cases when you have small sized CSV/vCard contacts. It can be the easiest process to import contacts to your iPhone.
Step 1: Compose mail with CSV/VCF file as an attachment & send it to your email address
Step 2: Open mail with your iPhone & click on attachment
Step 3: iPhone will prompt to add to add contact to your iPhone, click & follow the guidelines & process, you will find your contacts added to your iPhone contact list
2. Import CSV/VCF to Gmail and sync Gmail contacts to iPhone
Step 1: Open your Gmail account with your email address & password, Click "Gmail" from the left top & select "Contacts". Now, click "More" & select "Import" from the drop-down list

Step 2: A new pop-up window will open, click "Choose File" & browse for CSV/VCF file location, select the file & click "Open"

Step 3: Click "Import" to add VCF/CSF file to Gmail contacts
Step 4: Launch iTunes on your PC & connect your PC with iPhone via USB data cable
Step 5: Open the summary page by tapping "Devices" on your iPhone in the left sidebar of iTunes
Step 6: Go to "Info" tab on right -> Click "Sync Contacts with" checkbox -> select "Google Contacts" in the drop-down list & click "Sync" or "Apply" from the bottom-right corner

3. Import CSV/VCF into Outlook and sync Outlook contacts with iPhone 3GS/4/4S/5
Step 1: Open Outlook on your PC, go to File menu, select Open -> Import -> Import from another program or file -> Next

Step 2: A new “Import a File” window will open, select “Comma Separated Values (Windows)” or VCF file, then click “Next”

Step 3: Click “Browse” and import CSV/VCF file from your computer, click “Next” and then click “Finish” to import contacts from computer to Outlook Contacts folder

Step 4: Run iTunes on your PC & connect your PC with iPhone via USB data cable
Step 5: Tap on your iPhone under “Devices” entry on the left sidebar of iTunes to show the Summary page and click "info" tab -> contacts -> sync contacts with, select Outlook & click all contacts, after that click "apply" from the bottom-right and then and "Start" the process to sync Outlook contacts to iPhone 3GS/4/4S/5

4. Directly Import VCF File contacts to iCloud
Step 1: Turn on contacts option of iCloud on your iPhone by checking settings -> iCloud -> turn "contacts" on
Step 2: Open https://www.icloud.com on your PC & log-in with your apple ID & password to your iCloud account
Step 3: Click "setting" from the left corner & select "Import vCard"

Step 4: Browse & select VCF file from your PC & click "Open", contacts from vCard will automatically add to your iCloud contacts list and you can find the contacts into your iPhone 3GS/4/4S/5 address book
5. Import CSV/VCF to Windows contacts and sync contacts to iPhone
Step 1: Open "Run" window on your computer & type "wab" & click "ok"

Step 2: Click "Import" to open "Import Windows Contacts" pop-up window, select "CSV (Comma Separated Value)" or "vCard (VCF file)" & click "Import"
Step 3: Browse and select CSV/VCF file & click "Next" after that you can "Map the Fields you wish to Import" and click "Finish"
Step 4: Launch iTunes on your PC -> connect your iPhone & computer with USB data cable
Step 5: Tap on your iPhone under “Devices” entry on the left sidebar of iTunes to show the Summary page and click "info" tab -> contacts -> sync contacts with, select "Windows contacts" & click "apply" and "sync" on right corner
Saturday, 3 May 2014
How to Create New Outlook PST Data File to Move or Copy Items to It
1. Go to File -> New -> Outlook Data File
2. Click OK to created MS Outlook PST File
-> To create a Microsoft Outlook Personal Folders file (.pst) that offers greater storage capacity for items and folders and supports multilingual Unicode data, click OK.
-> For compatibility with earlier versions of Outlook, under Types of storage, click Microsoft Outlook 97-2002 Personal Folders File (.pst), and then click OK.
3. Provide name for your file, and then click OK.
4. In the Name box, type a display name for the .pst folder.
5. Select any other options you want, and then click OK.
-> The name of the folder associated with the data file appears in the Folder List. By default, the folder will be called Personal Folders.
6. Drag any item from your current folders to the new folder. Press CTRL while dragging to copy items instead of moving them.
Thursday, 1 May 2014
How to View Windows BKF File on Windows 8.1
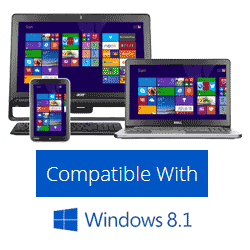
BKF Viewer for Windows 8.1
In Windows 8.1, you won’t find the backup NTBackup tool as in-built. In such a case you will not be able to view a BKF file created with the help of NTBackup tool in this new OS version. For that you will need our Windows 8.1 BKF viewer to easily view any BKF created elsewhere using the NTBackup tool. So, in a way our software works for you as a Windows 8.1 backup file viewer tool. Also, if you have downloaded NTBackup tool and using it, created some backup file in Windows 8.1 and at the time of restoration of data, this BKF file too got corrupted, then again our software can be at your disposal to help you out to restore data from that corrupted BKF file.Some Great Attributes of Our Tool
- Great efficiency
- Sure and shot productivity
- Results guaranteed
- Speed is the word here
- Easiness of use
- CHM help manual file to guide you through the process
- Free download available

Friday, 11 April 2014
How to Enter Current Time and Date in Excel Sheet
For current time and date in Excel Sheet, Please Enter =now(),
For current data in Excel Sheet, Please Enter =TODAY().
Note: Above functions work for current time which means, date/time entered will be automatically updated once the sheet is refreshed or reopened.
For fixed date, you can select a cell and press [ctrl] + [;]
For fixed time, press [ctrl] + [shift] + [;]
How to Move Excel Contacts to Outlook Contact List
Microsoft® Outlook holds the special place for keeping your contacts and other data together. On several occasions, you find the requirement to convert all your contacts from Excel in Outlook. While you discuss with others about your need for online software package, you will find many advices piled up in front of you. As a safety measure, choose simple steps to move Excel contacts to Outlook.

There are certain manual steps mentioned for moving Excel contacts in Outlook: You can import contacts from Excel to Outlook following three major steps:
There are certain manual steps mentioned for moving Excel contacts in Outlook: You can import contacts from Excel to Outlook following three major steps:
- Make your contact info ready to be imported in Outlook
- Then Import the contacts information
- Map the Excel worksheet column with apt Outlook fields
First Step: First of all save entire contact info from Excel in some file which Outlook can import
With Outlook, you can import CSV or Comma Separated Value files but no workbooks containing multiple sheets.- In the workbook, press the worksheet comprises of contact details which you need to import
- Click File then Save As.
- Select the location to save the file
- Go to Save as type box, select CSV (Comma delimited) (*.csv), press Save.
Note: Excel shows message that ‘The selected file type does not contain workbooks that contain multiple sheets.’ This is showing the drawback of CSV file but nothing wrong will happen to the original workbook - Press OK.
Note: Excel tells you “Some features in your workbook might be lost if you save it as CSV (Comma delimited).” This refers only to limitations of the CSV file and can be ignored. - Press on ‘Yes’ to have Excel and save the latest worksheet as a CSV file. The original workbook or the .xlsx file closes. After this close the CSV file as well.
Note: By going through above mentioned steps, you have done with Excel. Begin with import process in MS Outlook.
Second Step: Begin Import Process
- Go to Outlook, Press File >> Open & Export >> Import/Export.
Note: This help begin working with Import and Export Wizard. - Select Import from some other program or file and press ‘Next’
- Select Comma Separated Values and press ‘Next’
- Browse the CSV file you need to import.
- Under the Options, select if you want to replace duplicates (existing contacts), generate duplicate contacts else will not import duplicates.
- Press ‘Next’ and select the destination folder. Select the contacts by default, but if this is not the case, scroll up or down until and unless you fetch them. You can find a different folder otherwise, create a new folder.
- Click Next.
- Ensure that check box next to Import ‘MyContacts.csv’ is chosen.
- ‘Map’ few of the columns in your CSV file to the contact fields in Outlook. With mapping you can easily import contacts turn out the way you need.
Third Step: Map CSV files columns to the Outlook contact fields
- Press the Map Custom Fields button and you will find it popped up on screen.
-> A box containing names from the CSV file you're importing will appear.
-> Under To, you will find the standard fields which Outlook uses for contacts. In case when a field matches with the column in the CSV file, you will see the column under Mapped from.
-> The fields Name, First Name, and Last Name is the standard Outlook contact fields, in case the contact info in your file has these contact names, you can go for it. - Perform manual mapping.
- In the pane on the left, drag Cell Ph and drop it on Mobile Phone in the right pane.
-> You'll notice that Cell Ph now appears next to Mobile Phone in the Mapped from column. - At a time, do with the one then drag other values from the left pane to the suitable Outlook fields in the right pane.
- Click Finish.
Drawbacks of manual method: You will find the above mentioned method a cumbersome procedure. This process is so very long and at the same time to be followed. In fact, you are likely to face issue slow conversion, difficulties etc. It is better to opt for professional help where you have to pay less and get more effective consequences.
Keep away from migration hurdles via professional solution: By using online utility like Excel to Outlook, there are ample chances of making quick and safe contacts migration. This professional solution uses easy steps.
Keep away from migration hurdles via professional solution: By using online utility like Excel to Outlook, there are ample chances of making quick and safe contacts migration. This professional solution uses easy steps.
Thursday, 3 April 2014
How to Combine Text in Excel Cells
One of the most asked feature available in Excel is to combine text from multiple cells into one cell.
Let us take an Example with Name i.e. First & Last name which is when received in two separate columns one can find it difficult to combine them together. But using this feature one can easily combine 2 columns in a separate column.
You can name D1 as "Full Name"
Enter any of the following formulas in Cell D2
=B2 & " " & C2 (will give you "FirstName LastName")
=B2 & ", " & C2 (will result in "FirstName, LastName")
=B2&C2 (will result in "FirstNameLastName")

Let us take an Example with Name i.e. First & Last name which is when received in two separate columns one can find it difficult to combine them together. But using this feature one can easily combine 2 columns in a separate column.
As shown below in image:
We have Column B with first name & Column C with last nameYou can name D1 as "Full Name"
Enter any of the following formulas in Cell D2
=B2 & " " & C2 (will give you "FirstName LastName")
=B2 & ", " & C2 (will result in "FirstName, LastName")
=B2&C2 (will result in "FirstNameLastName")
Subscribe to:
Posts (Atom)